Building a Simple Field Shelter for Goats or Sheep on Small Acreage
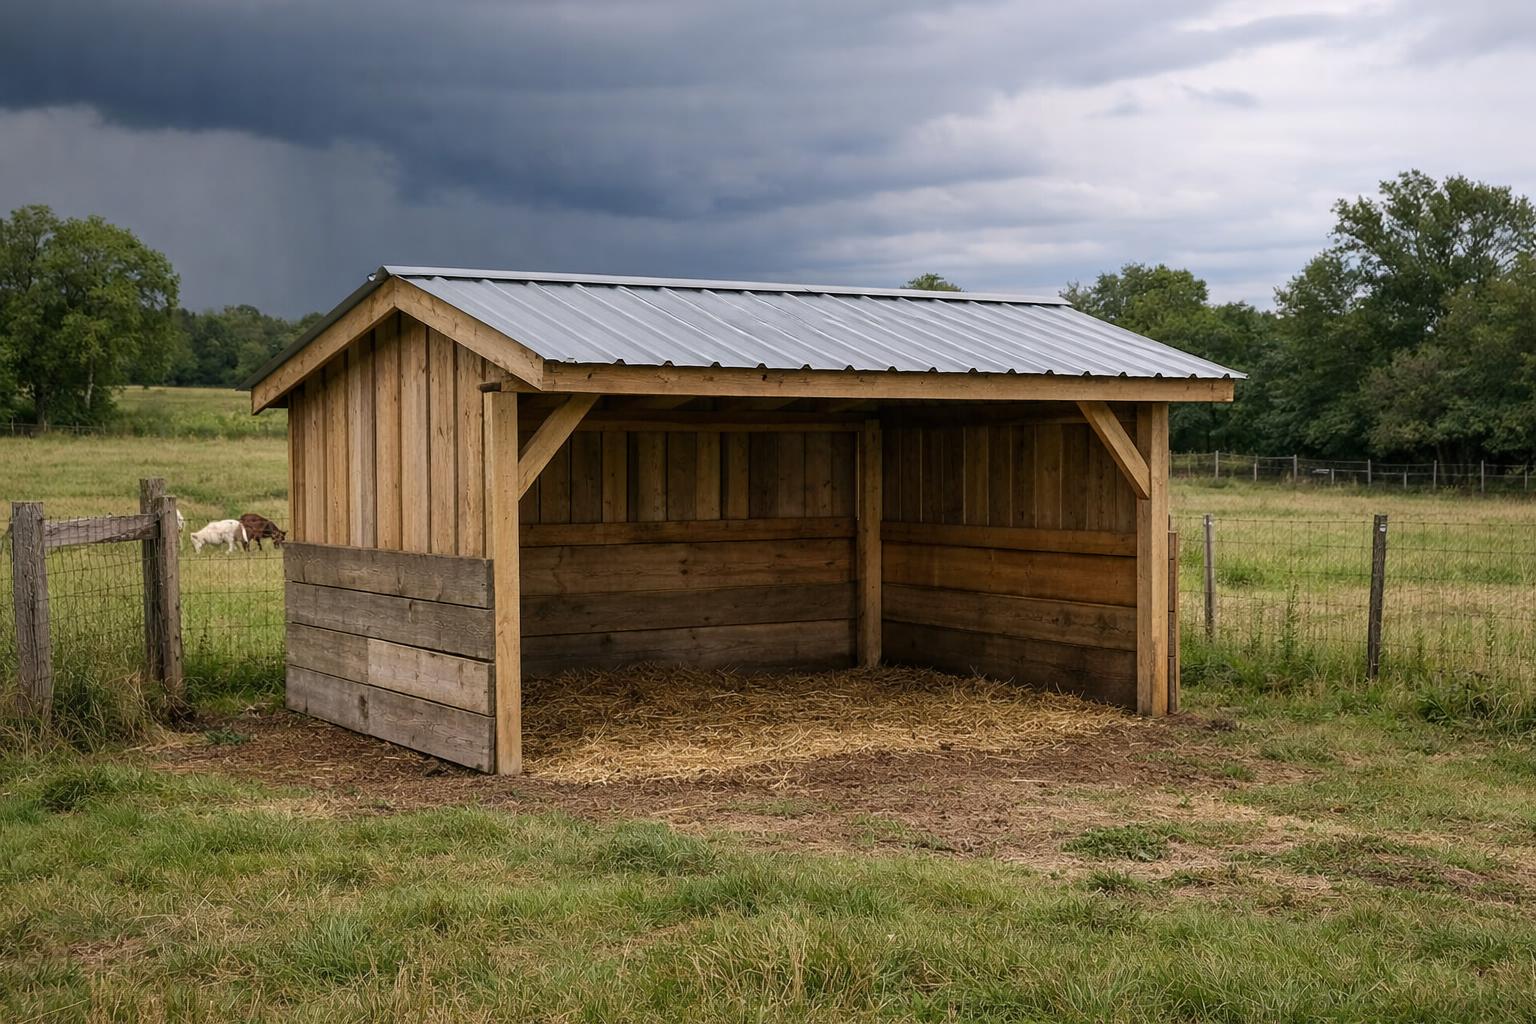
Imagine a sudden storm rolling in while your goats or sheep are grazing, leaving you scrambling to provide them with shelter. If you're managing a small acreage, having a simple yet effective field shelter can make all the difference for your livestock's safety and your peace of mind. A well-built, three-sided run-in shelter is not only a practical solution but also a cost-effective project that you can tackle over a weekend, providing your animals with refuge from both inclement weather and harsh sunlight.
Understanding Your Shelter Needs
Before you start building, it's crucial to assess your specific needs based on the number of animals you have and your property's climate. A field shelter should comfortably accommodate your livestock without overcrowding. Each goat or sheep requires approximately 15–20 square feet of space within the shelter. This ensures they have enough room to move around and lie down comfortably.
Additionally, consider your local weather patterns. If you experience heavy snowfall or frequent rain, your shelter design may need to include a steeper roof pitch and more substantial materials. Conversely, if you're in a hot, sunny area, ventilation will be a top priority to ensure your animals remain cool.
A common mistake on small acreages is building the shelter too small and then crowding animals during bad weather. Overcrowding leads to respiratory illness, elevated stress, and fighting. If you currently have 5 goats, size your shelter for 8—animals breed, neighbors ask you to board a few, and a shelter that's too small is far more expensive to fix than one that was built with a little extra room.
Choosing the Right Location
The location of your field shelter is just as important as its construction. Ideally, the shelter should be positioned on a slight slope to promote water drainage, preventing flooding during heavy rains. A location that is accessible yet away from the main prevailing wind direction will keep your animals warm and dry.
- Elevation: Choose a spot that is slightly elevated, avoiding low-lying areas prone to water accumulation.
- Orientation: The open side of the shelter should face away from the prevailing winds, usually south or southeast in most North American climates.
- Accessibility: Ensure that the shelter is easily accessible for both your livestock and for you to clean and maintain it.
If your land has a natural windbreak—a tree line, existing fence line, or hill—position the shelter to take advantage of it. A cedar row on the north and west sides can cut the wind chill inside your shelter by 30–40%, which matters more than insulation on small acreages where full barn construction isn't practical.
Gathering Your Materials
Building a field shelter is a project that balances durability with budget. For a structure that is approximately 10 feet wide, 12 feet deep, and 8 feet high, you will need the following materials:
- Pressure-treated wood: For the frame, use 4x4 posts for the corners and 2x4 lumber for the walls and roof. You'll need about 10-12 4x4 posts and 20-25 2x4 boards.
- Roofing material: Corrugated metal or polycarbonate panels are excellent choices for roofing. You will need approximately 7-8 panels measuring 3 feet by 12 feet each.
- Plywood or OSB: Use 5/8-inch thick boards for the back and side walls to provide a solid barrier against the wind.
- Fasteners: Galvanized screws and nails will prevent rust and extend the lifespan of your structure.
- Concrete: For setting the posts, you'll need about 3–4 bags of concrete mix.
The total cost for materials can range from $500 to $800, depending on local prices and the quality of materials chosen.
Building the Shelter
Step 1: Laying the Foundation
Start by marking out your shelter area using stakes and string. Dig post holes at each corner, about 3.5 feet deep in firm soil or 4 feet in sandy soil. Place a 4x4 post in each hole and fill with concrete, ensuring each post is level and aligned with the others. Allow the concrete to cure for at least 24 hours before proceeding.
Step 2: Constructing the Frame
Attach 2x4 lumber horizontally between each pair of posts to form the frame of the walls. Space these boards 2 feet apart vertically. For the roof, create trusses by securing 2x4 boards every 4 feet along the top of the walls, ensuring they have a slight pitch for water runoff.
Step 3: Installing the Roof and Walls
Secure your roofing panels to the trusses using roofing screws with rubber washers to prevent leaks. Overlap each panel by about 4 inches to ensure proper coverage. For the walls, attach the plywood or OSB vertically to the frame, leaving the front side open for easy access.
Step 4: Adding Finishing Touches
To enhance the shelter's durability, consider painting or staining the wood with a weather-resistant finish. This not only protects the wood but also helps the shelter blend into the landscape. Additionally, if your climate is particularly harsh, adding a layer of insulation or windbreak material to the inside can provide extra protection for your animals.
Flooring and Drainage Inside the Shelter
Many small acreage owners skip the flooring step and end up fighting mud and standing water every winter. After the structure is built, grade the interior floor so it slopes toward the open front—even a 1-inch drop over 12 feet is enough to shed water. Then add a 4-inch base of compacted gravel or crushed limestone before spreading bedding.
Deep-bedding the shelter floor with straw creates a composting pack that generates mild warmth through microbial activity—a meaningful benefit for small shelters with no supplemental heat. Add 2–3 inches of fresh straw weekly rather than removing all bedding each time. Full cleanout twice per year, in spring and fall, keeps ammonia levels safe and prevents hoof rot.
Maintenance and Longevity
Regular maintenance will significantly extend the life of your field shelter. Inspect the structure at least twice a year, checking for any damage to the wood or roof, and make repairs as needed. Ensure the ground around the shelter remains free from excessive mud by adding gravel or straw, which will also help with drainage.
Pay particular attention to the base of the corner posts, where moisture collects and rot starts. Probe each post base annually with a screwdriver—if the wood gives more than a quarter inch, replace the post before it fails. A collapsed shelter in winter is an emergency; catching a soft post in August is a half-day repair job.
Key Takeaways
- Space Requirements: Provide at least 15–20 square feet per animal, and build for your herd's expected size in 2–3 years rather than today's headcount.
- Site Selection: Position your shelter on elevated ground, facing away from prevailing winds; use existing tree lines or fence lines as windbreaks when possible.
- Material Choices: Use pressure-treated 4x4 posts and corrugated metal roofing for a shelter that lasts 15–20 years with routine maintenance.
- Construction Tips: Set posts 3.5–4 feet deep in concrete for stability and pitch the roof so water runs to the back or sides, away from the open entrance.
- Flooring: Grade the interior floor toward the open front and use a 4-inch gravel base with a deep-bedding straw pack to control mud and retain warmth.
- Maintenance: Probe post bases annually for rot, add fresh straw weekly, and do a full cleanout twice a year to prevent hoof rot and ammonia buildup.
- Budget: Expect to spend $500–$800 on materials for a 10×12-foot shelter; that cost amortizes to under $50 per year over a 15-year lifespan.
Building a field shelter is an investment in your livestock's health and well-being. With careful planning and execution, your shelter will serve as a reliable refuge for years to come.
Stop Seeing Deer Only at 2 AM — Get the Free 10-Point Habitat Fix
Your property has specific, fixable gaps — and most 1–50 acre hunters never find them. This free checklist pinpoints exactly what's missing and tells you what to change first so deer start showing up when you can actually hunt them.
- ✓ The food plot timing that pulls deer into daylight hours
- ✓ How to build bedding cover with just a chainsaw (no equipment needed)
- ✓ Stand placement mistakes silently blowing out your property
- ✓ The #1 pressure rule most hunters skip — and deer remember
- ✓ Low-pressure access routes most small acreage owners never plan