How to Inspect and Repair Pasture Fence on Small Acreage
A downed pasture fence discovered at sunrise — with livestock already wandering the road — is one of the most costly surprises for small acreage landowners. Most fence failures don't happen overnight. They develop over months from rust, loose staples, leaning posts, and ignored wire sag. A twice-yearly inspection routine and a basic repair kit will keep your fence reliable and your animals where they belong.
Step 1: Set Up Your Inspection Schedule and Kit
Walk your fence at least twice a year — once in early spring before you turn animals out and once in late fall after grazing season. After any major windstorm, ice event, or flooding, do a spot check of the sections most likely to take damage: creek crossings, fence lines adjacent to trees, and low corners where debris collects.
Before you walk the fence, load a small backpack or bucket with:
- A fence stretcher or come-along
- Wire clips and a crimping tool
- A staple gun and 1.5-inch galvanized staples
- A pair of wire cutters and fencing pliers
- 6–8 spare T-posts
- A roll of tie wire or smooth wire for splicing
- Post driver (manual or gas-powered for longer fence lines)
Having the right tools on hand means you can fix minor problems during the walk instead of making a second trip. On a 5- to 20-acre property, most fence lines can be walked in under two hours.
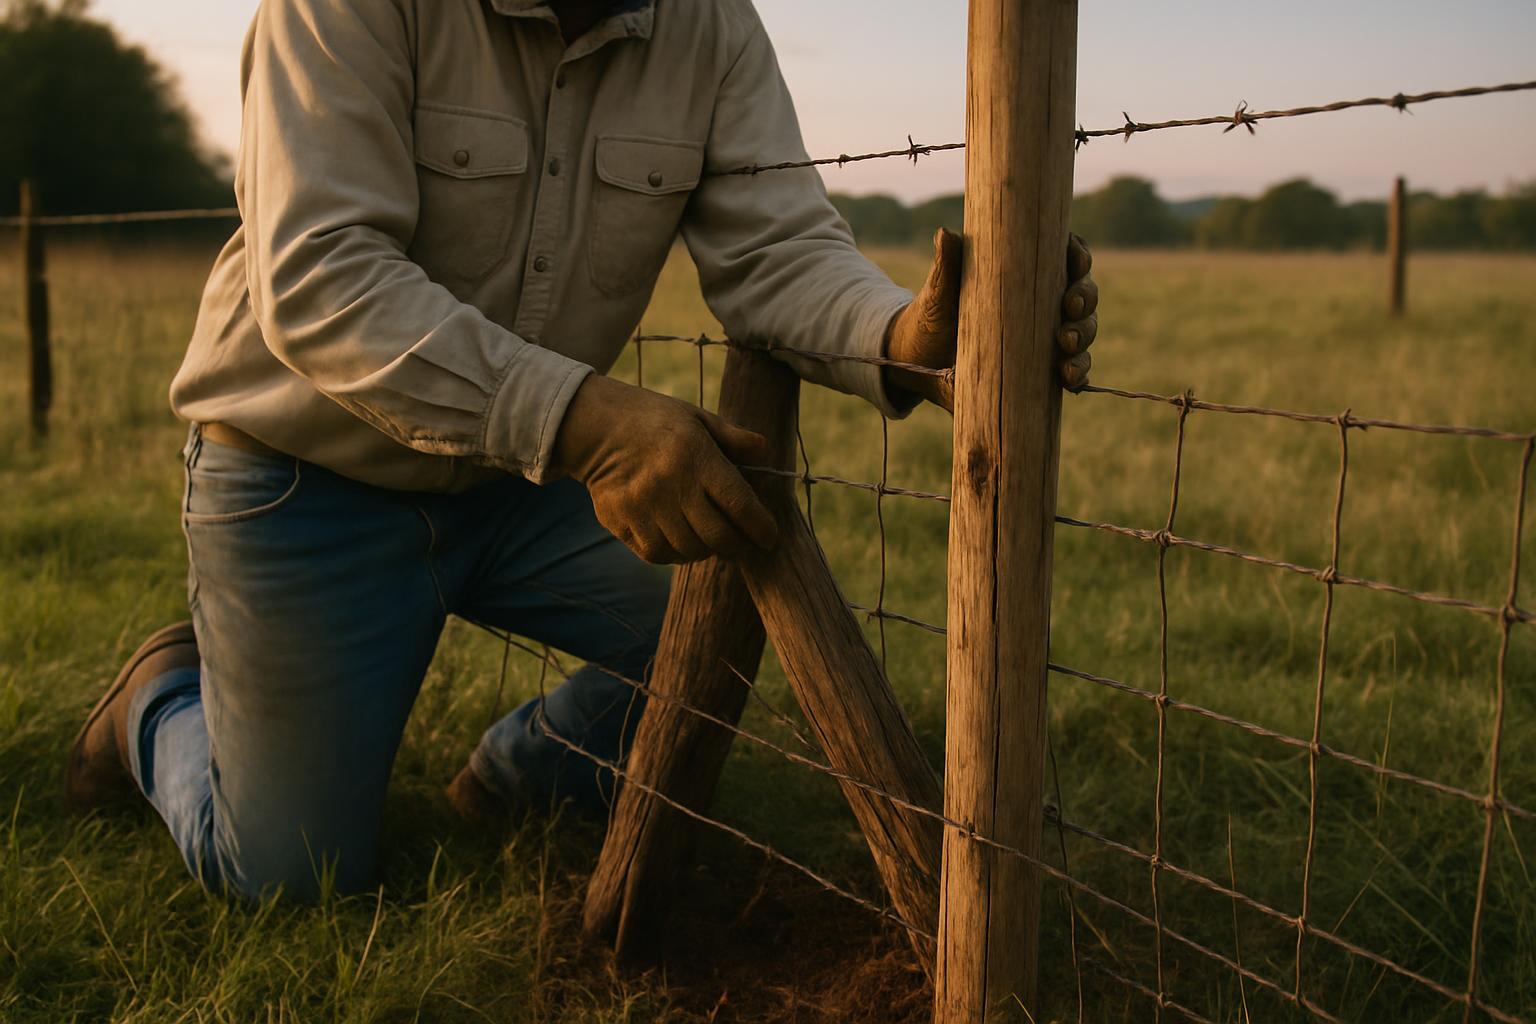
Step 2: Check Posts Before You Look at Wire
Posts determine whether the wire will hold under load. A tight-looking wire attached to a rotten post gives you false confidence. Start every inspection by checking posts first.
Wood corner and brace posts should not rock when you grab them at chest height and push firmly. Any movement means the post is loose in the ground or the base is rotting. Test every corner post, H-brace post, and end post this way. These posts carry most of the tension load — replace them before they fail.
T-posts along the fence run should stand vertical or close to it. A T-post leaning more than 10 degrees toward or away from the pasture means it has shifted, either from frost heave, soil erosion, or impact from animals. Drive a new T-post 12 inches from the leaning one, transfer the wire clips, and remove the bad post. T-posts set 8 feet apart with a depth of at least 18 inches in firm ground resist leaning under normal conditions.
Check the base of wood posts at ground level. This is where rot starts. Drive a screwdriver or fence spike into the post near the soil line. If it sinks more than half an inch with light pressure, the post is compromised. A post that looks fine from 4 feet up can be hollowed out at ground level.
Step 3: Inspect Wire Condition and Tension
Walk each panel of wire and run your hand along it to feel for sharp ends, kinks, and broken strands. Look for:
Loose wire. A section of woven wire that sags more than 3 inches between posts needs to be retensioned. Low wire lets small animals through and tempts cattle to push against it. Use a fence stretcher positioned mid-panel to pull the sag out, then add a clip to the nearest T-post to hold the tension.
Broken strands. On woven wire, a single broken horizontal strand weakens the panel but rarely requires replacing the whole section. Splice it with a 12-inch piece of matching wire, twisting at least 4 turns on each side of the break. Two or more broken strands in the same panel mean it's time to replace that section.
Rust and corrosion. Surface rust on galvanized wire is cosmetic. Rust that flakes off when you bend the wire slightly means the galvanizing is gone and the wire is losing structural integrity. Replace sections where the wire feels brittle or snaps when bent 90 degrees.
Wire tight against or buried in tree trunks. Trees grow around wire and create a mess that's expensive to fix. Keep a 6-inch gap between wire and any living tree. If a tree has already grown into the wire, you have two choices: cut the tree or cut the wire and reroute around the tree trunk.
Step 4: Fix Staples and Wire Clips
Loose staples are the most common and easiest problem to fix. A staple that's pulled out half an inch from a wood post is no longer doing its job — it's just decorating the wood. Drive it back flush or replace it with a new 1.5-inch staple at a slightly different angle so it bites into fresh wood.
Never drive staples all the way flush against woven wire on wood posts. Leave a hair of gap so the wire can flex slightly under load without cracking at the staple point. The wire should be snug against the post but not pinched.
On T-posts, check wire clips every 8 to 10 posts. Wire clips can pop off if animals push against the fence repeatedly. Carry a clip crimper and a handful of spare clips on every fence walk. A loose clip takes 30 seconds to replace.
Step 5: Evaluate Low-Sag Sections and Add Stays
On fence runs longer than 200 feet, wire tends to sag between T-posts over time — especially the top wire of woven fence. Before adding a new T-post (which requires driving), check whether a fence stay will solve the problem.
A fence stay is a short vertical wire rod or twisted wire brace that clips between the top and bottom wires to space them and stiffen the panel without adding a new ground post. You can buy manufactured stays or make them from scrap smooth wire. Add a stay every 4 feet in badly sagging sections.
If stays won't fix the problem — usually because the ground-level wire is also sagging — drive a new T-post mid-panel. Use a manual post driver if you have 5 or fewer posts to add; a gas-powered driver saves significant effort on longer runs.
Step 6: Document What You Find
After each fence walk, take 5 minutes to write down the location and condition of any problems you noted but didn't fix on the spot. A simple handwritten log — "NE corner, third post south of gate, wood post loose" — is enough. Over two or three inspection cycles, patterns emerge: the northwest fence line always needs re-stapling, the corner near the pond always has at least one loose post.
This documentation helps you budget for materials, justify capital improvements (replacing wood posts with steel on a high-wear section), and brief a helper who walks the fence without you.
Key Takeaways
- Walk your fence at minimum twice a year — spring before turnout and fall after grazing — plus after major weather events.
- Test every corner and brace post for movement at chest height before inspecting wire; post failure causes wire failure.
- Carry a repair kit on every fence walk so minor problems get fixed immediately rather than put off.
- Sagging wire between T-posts can often be fixed with a fence stay; add a new T-post only when stays aren't enough.
- Replace any wire that snaps when bent 90 degrees or that shows deep corrosion — surface rust alone is not a reason to replace.
- Keep a simple written log of fence problems so you can spot recurring weak sections and plan targeted improvements.
Stop Seeing Deer Only at 2 AM — Get the Free 10-Point Habitat Fix
Your property has specific, fixable gaps — and most 1–50 acre hunters never find them. This free checklist pinpoints exactly what's missing and tells you what to change first so deer start showing up when you can actually hunt them.
- ✓ The food plot timing that pulls deer into daylight hours
- ✓ How to build bedding cover with just a chainsaw (no equipment needed)
- ✓ Stand placement mistakes silently blowing out your property
- ✓ The #1 pressure rule most hunters skip — and deer remember
- ✓ Low-pressure access routes most small acreage owners never plan