How to Install an Electric Fence on Small Acreage: A Complete Guide
If your livestock found a gap in the fence at 6 a.m. last summer, there's a good chance it was an electric fence that wasn't grounded properly or had lost its charge without you noticing. Electric fences are one of the most cost-effective perimeter tools available to small acreage landowners — but only when they're installed correctly. A fence that delivers a weak or nonexistent shock quickly becomes a fence your animals learn to ignore. This guide walks you through the complete installation process so your fence works the first time and keeps working through every season.
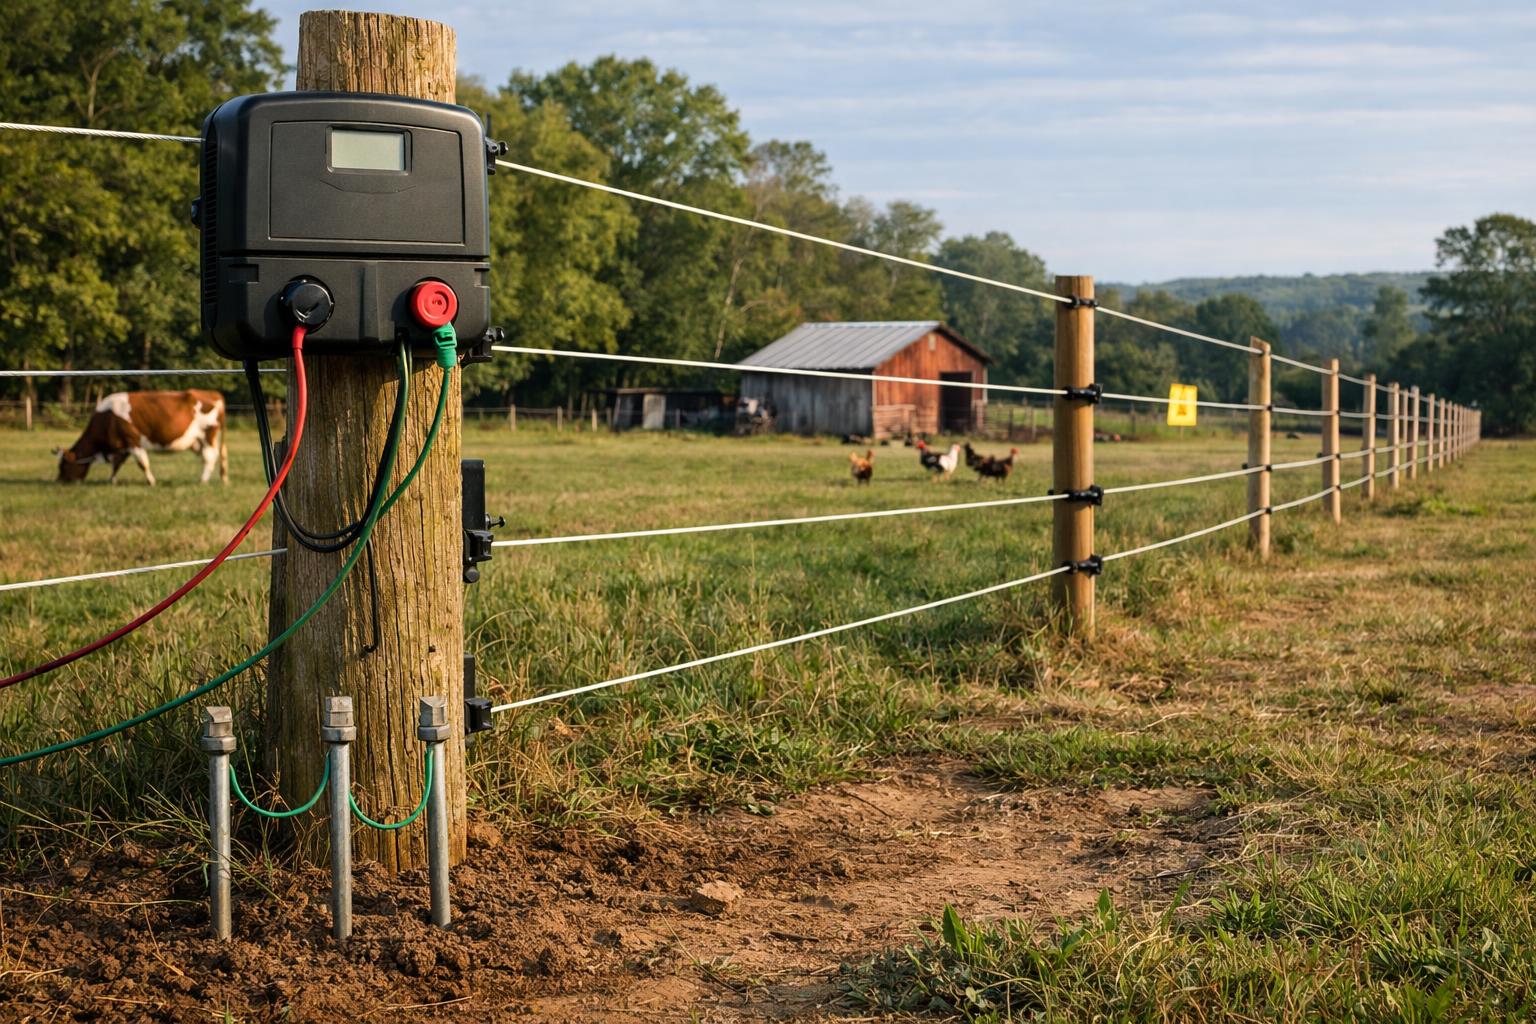
Step 1: Size Your Energizer Correctly
The energizer — sometimes called a fencer or charger — is the heart of the system. Undersizing it is the most common mistake small landowners make, and it's expensive to fix after the fact.
Energizer output is measured in joules. For a basic perimeter fence with 1–3 wires on up to 20 acres, a 1.0–1.5 joule energizer is usually sufficient in ideal conditions. For 20–50 acres, move to a 2.0–3.0 joule unit. If your pasture has heavy vegetation or you're running more than 3 wires, add 50% to your joule estimate — weeds touching the fence bleed off charge constantly.
Choose between three power sources based on your situation:
- Plug-in energizers (AC): Most powerful and reliable for permanent installations near a power source. Run a weatherproof outdoor extension cord or have an electrician install an outlet at your corner post.
- Battery-powered energizers: Good for temporary setups or remote locations. Use a quality 6V or 12V deep-cycle battery and check charge monthly.
- Solar energizers: Ideal for remote pastures without power access. Buy a unit with at least 3–5 watts of solar panel capacity and a built-in battery for cloudy days.
Plan your energizer location near a corner post where you can easily access it for troubleshooting. Hang it off the ground — never set it on the soil.
Step 2: Set Your Posts at the Right Spacing
Post spacing determines how well your fence holds its line and how much sag develops between posts over time. The right spacing depends on your terrain and wire type.
Flat to gently rolling terrain: Space line posts 50–60 feet apart for 2–3 strand fencing. This is the sweet spot between material cost and fence performance.
Hilly or uneven terrain: Reduce spacing to 30–40 feet where the fence changes direction significantly or dips into low spots. Fence wire that goes slack at the bottom of a dip creates a gap livestock will find.
Corner posts and end posts: These carry the full tension of the fence and must be set deeper and braced. Minimum depth for corner posts is 3.5 feet in firm soil — go to 4 feet in sandy or loose ground. Install an H-brace at every true corner using a 6–8 foot horizontal brace rail between the corner post and a second post 8 feet away.
For the line posts themselves, most small landowners use a combination of wood posts and fiberglass or poly step-in posts:
- Wood posts at corners, gates, and every 10th position for structural support
- Fiberglass line posts for intermediate positions — they're insulating, flexible, and don't require plastic insulators
- Step-in poly posts for temporary divisions and rotational grazing lanes
Drive wood posts with a manual post driver or a tractor-mounted hydraulic driver. Set fiberglass posts by hand with a rubber mallet or your foot — never drive them with steel, which splits the top.
Step 3: Install the Ground System Properly
Bad grounding causes more electric fence failures than any other single factor. If your fence isn't shocking reliably, check the ground before anything else.
A proper ground system consists of 3–6 galvanized ground rods, each 6 feet long, driven 6 feet into the earth and spaced 10 feet apart. Connect them in series with 12.5 gauge galvanized wire using galvanized clamps — not aluminum, which corrodes at the connection and loses conductivity within a season.
General rule: install at least one 6-foot ground rod for every joule of energizer output. A 2-joule energizer needs a minimum of 2 ground rods, but 3 is better insurance.
Ground system tips that prevent failures:
- Place your ground rods in an area that stays moist year-round (low ground, near a water source, shaded area). Dry soil has high electrical resistance and dramatically reduces shock effectiveness.
- Never use galvanized wire and copper wire in the same ground system — they corrode each other rapidly.
- Test your ground regularly: touch a weed or green stick to the hot wire, then touch a separate grounding rod you push into the soil nearby. A good fence tester should read over 2,000 volts at the weed-to-ground rod test. Under 2,000 volts means the ground system needs attention.
Step 4: Run Your Wire at the Right Heights
Wire height depends entirely on what you're containing or excluding. Getting this wrong means the fence doesn't touch the animal at a sensitive spot and fails to deter them.
Cattle (mature cows and bulls):
- 2-wire fence: 22 inches and 42 inches from ground
- 3-wire fence: 20, 32, and 46 inches from ground
Cattle with calves:
- Add a bottom wire at 10–12 inches to deter calves from slipping under
Horses:
- 2–3 wires at 24, 36, and 48 inches; use highly visible tape or rope wire rather than single-strand wire to reduce strike injuries
Pigs:
- Start at 6 inches from ground for piglets; 10–12 inches for adult pigs. Pigs root under and must be trained to the fence before being turned into a new pasture.
Predator exclusion (coyotes, dogs):
- 5–7 wire fence starting at 6 inches from ground with wires spaced 6–8 inches apart up to 36 inches
String your wire using an insulated wire reel that lets you walk the line without stopping. Keep tension firm — wire should have minimal sag but not be pulled so tight it breaks at the insulators.
Step 5: Train Your Animals Before Turning Them Out
An electric fence only works if your animals know it's electrified. Untrained animals walk through hot wire the first time without registering what hit them.
Set up a small training paddock inside a secure, non-electric perimeter before relying on electric fence alone. Bait the inside of the wire with something attractive — a mineral lick or grain pail — positioned so animals approach the fence from the inside. Let them get shocked reaching through or over the wire. Two to three shocks over 48–72 hours usually trains most cattle or horses.
Sheep and goats are harder to train and harder to contain with electric fence alone. If you're using electric fence for sheep or goats on small acreage, plan on 5–7 strands with the bottom wire at 6 inches and tight spacing between wires from the ground up.
Troubleshooting an Electric Fence That's Lost Its Charge
When the fence stops working, walk the line with a digital fence tester before assuming the energizer is the problem. In most cases, the issue is vegetation contact, a broken insulator, or a bad connection — not a failed energizer.
Common failure points:
- Vegetation contact: Weeds, grass, or tree branches touching the wire bleed off charge. Mow under the fence line twice a season and use herbicide around the base of posts.
- Broken insulators: UV exposure cracks plastic insulators over time, creating a path for current to leak to the post. Carry spare insulators and replace any that are cracked or broken.
- Loose or corroded wire connections: Any splice in the wire or connection at the energizer terminal that corrodes reduces conductivity. Use weatherproof wire connectors and check all connections annually.
- Partial wire break: A wire that's 90% broken still conducts but will snap on the next tension event. Look for spots where the wire is kinked, rusty, or has visible wear.
If the tester reads below 2,000 volts throughout the line, start at the energizer output terminal. A reading of full voltage at the terminal means the problem is downstream in the fence. A low reading at the terminal means the energizer itself or the ground system is the problem.
Key Takeaways
- Size your energizer by joules relative to acreage and wire count — plan for at least 1 joule per 20 acres in clean conditions, more with vegetation.
- Install a minimum of 3 galvanized ground rods for any fence system; place them in consistently moist soil and connect them with galvanized wire only.
- Set corner and end posts at least 3.5 feet deep with proper H-brace support — these carry the full tension load of the fence.
- Match wire heights to your specific livestock species; the fence only deters animals that contact it at a sensitive point.
- Train animals to the fence in a safe paddock before relying on electric fence as a primary perimeter.
- Troubleshoot failures by walking the line with a digital tester before replacing the energizer — vegetation and broken insulators cause the majority of failures.
Stop Seeing Deer Only at 2 AM — Get the Free 10-Point Habitat Fix
Your property has specific, fixable gaps — and most 1–50 acre hunters never find them. This free checklist pinpoints exactly what's missing and tells you what to change first so deer start showing up when you can actually hunt them.
- ✓ The food plot timing that pulls deer into daylight hours
- ✓ How to build bedding cover with just a chainsaw (no equipment needed)
- ✓ Stand placement mistakes silently blowing out your property
- ✓ The #1 pressure rule most hunters skip — and deer remember
- ✓ Low-pressure access routes most small acreage owners never plan