How to Fix Waterlogged Land: Drainage Solutions for Rural Property
Why Poor Drainage Costs You More Than You Think
If you have a low spot on your property that stays wet for three weeks after every rain, you already know the frustration. But waterlogged land costs more than muddy boots. Wet soil compacts under livestock traffic, destroying the root structure of grass and turning pasture into bare, eroded ground. Fence posts sitting in saturated soil rot in half the expected time. Equipment and vehicles chew up wet ground and create ruts that channel even more water into the problem area. What looks like a minor inconvenience in spring can permanently reduce carrying capacity and increase maintenance costs across the entire property.
The good news is that most drainage problems on small acreage — properties between 1 and 50 acres — are fixable without bringing in a full earthmoving crew. Understanding what type of drainage problem you have is the first step to choosing the right solution.
Step 1: Diagnose the Problem Before You Dig
Not all wet areas are the same, and treating the wrong cause is how landowners waste money on fixes that don't work. Walk your property after a heavy rain and take notes on where water sits, how long it takes to drain, and which direction it flows.
Surface ponding happens when rain falls faster than the ground can absorb it or when low spots have no outlet. Water pools on top of the soil and drains slowly through evaporation. The fix is creating a path for water to flow out — not trying to make it sink into the ground faster.
Seep areas and springs stay wet even in dry weather because groundwater is moving up through the soil profile. These require different handling than surface water — French drains and tile drains intercept subsurface flow before it reaches the surface.
Compaction ponding occurs in high-traffic areas like gates, feeding spots, and water tank surrounds. The soil is so compressed that water cannot penetrate at all. The fix starts with deep tillage or subsoiling, not drainage infrastructure.
Upslope runoff means your wet spot isn't the problem — it's just where water from higher ground ends up. Intercepting that flow with a diversion ditch before it reaches the low area solves it at the source.
Dig a simple test hole about 12 inches deep in the wet area and watch what happens after a rain. If it fills with water quickly from the sides, you have a high water table issue. If it fills only from above, the problem is surface water with nowhere to go.
Step 2: Surface Ditches for Runoff Interception
For most rural landowners, a hand-dug or small-equipment surface ditch is the most practical first tool. A properly shaped ditch collects surface water and moves it to a designated outlet — a pond, a creek, a culvert under a road, or a wooded area where the water can spread out without causing erosion.
Sizing a surface ditch:
A ditch doesn't need to be large to be effective. For a typical 1 to 5-acre drainage area, a ditch 18 to 24 inches wide and 12 to 18 inches deep is usually sufficient. The critical factor is the slope — the ditch bottom needs to drop consistently toward the outlet at a minimum of 0.5% grade (about 6 inches of fall per 100 feet of ditch length). Flatter than that and the water stalls, sediment builds up, and the ditch stops working.
Placement and shape:
The most effective ditch for intercepting slope runoff is the V-ditch or trapezoidal ditch positioned across the slope, just uphill of the wet area you're trying to protect. Water hits the ditch before it reaches the low spot and gets redirected to an outlet at the end of the ditch.
Slope the ditch walls at about 1:1 (one foot horizontal for every foot of depth) if the soil is reasonably stable. Steep vertical walls collapse in sandy or loose soils. Seed the disturbed soil immediately with a fast-germinating grass mix to prevent erosion before the first rain.
Outlet protection:
Where the ditch discharges, protect the soil from erosion with a few loads of riprap (coarse gravel or crushed rock). A discharge that concentrates flow onto bare soil will quickly cut a new erosion channel that undermines the whole system.
Step 3: French Drains for Subsurface Wet Areas
When a seep or high water table keeps an area wet from below, a French drain intercepts the moving groundwater before it saturates your soil surface. This is a perforated pipe surrounded by gravel, buried in a trench, that collects subsurface water and carries it to a lower outlet.
Installation steps:
- Mark a trench line from the wet area to a downslope outlet. The trench needs to be deep enough to reach the water-bearing layer — typically 18 to 36 inches for most seep areas on small acreage.
- Dig the trench with a trenching machine (rental cost runs $150 to $250 per day) or a mini excavator. Hand-digging is feasible for short runs under 30 feet but is hard work.
- Line the trench bottom and sides with landscape fabric before adding gravel. This keeps fine soil particles from migrating into the gravel and eventually clogging the system.
- Add 3 to 4 inches of washed gravel (3/4 inch clean stone is ideal — not pea gravel, which compacts) before laying the perforated pipe. Perforations face down so water enters from the bottom.
- Surround the pipe with at least 6 inches of gravel on all sides, then fold the landscape fabric over the top before backfilling with soil.
- Mark both ends of the French drain with a stake or GPS coordinate so you can locate it later if maintenance is needed.
A 4-inch perforated pipe in a proper gravel bed can handle the subsurface drainage for 1 to 2 acres of moderately wet ground. For larger areas or more severe seeps, use a 6-inch pipe or run parallel drains in a herringbone pattern, all feeding to a main collector pipe at the low end.
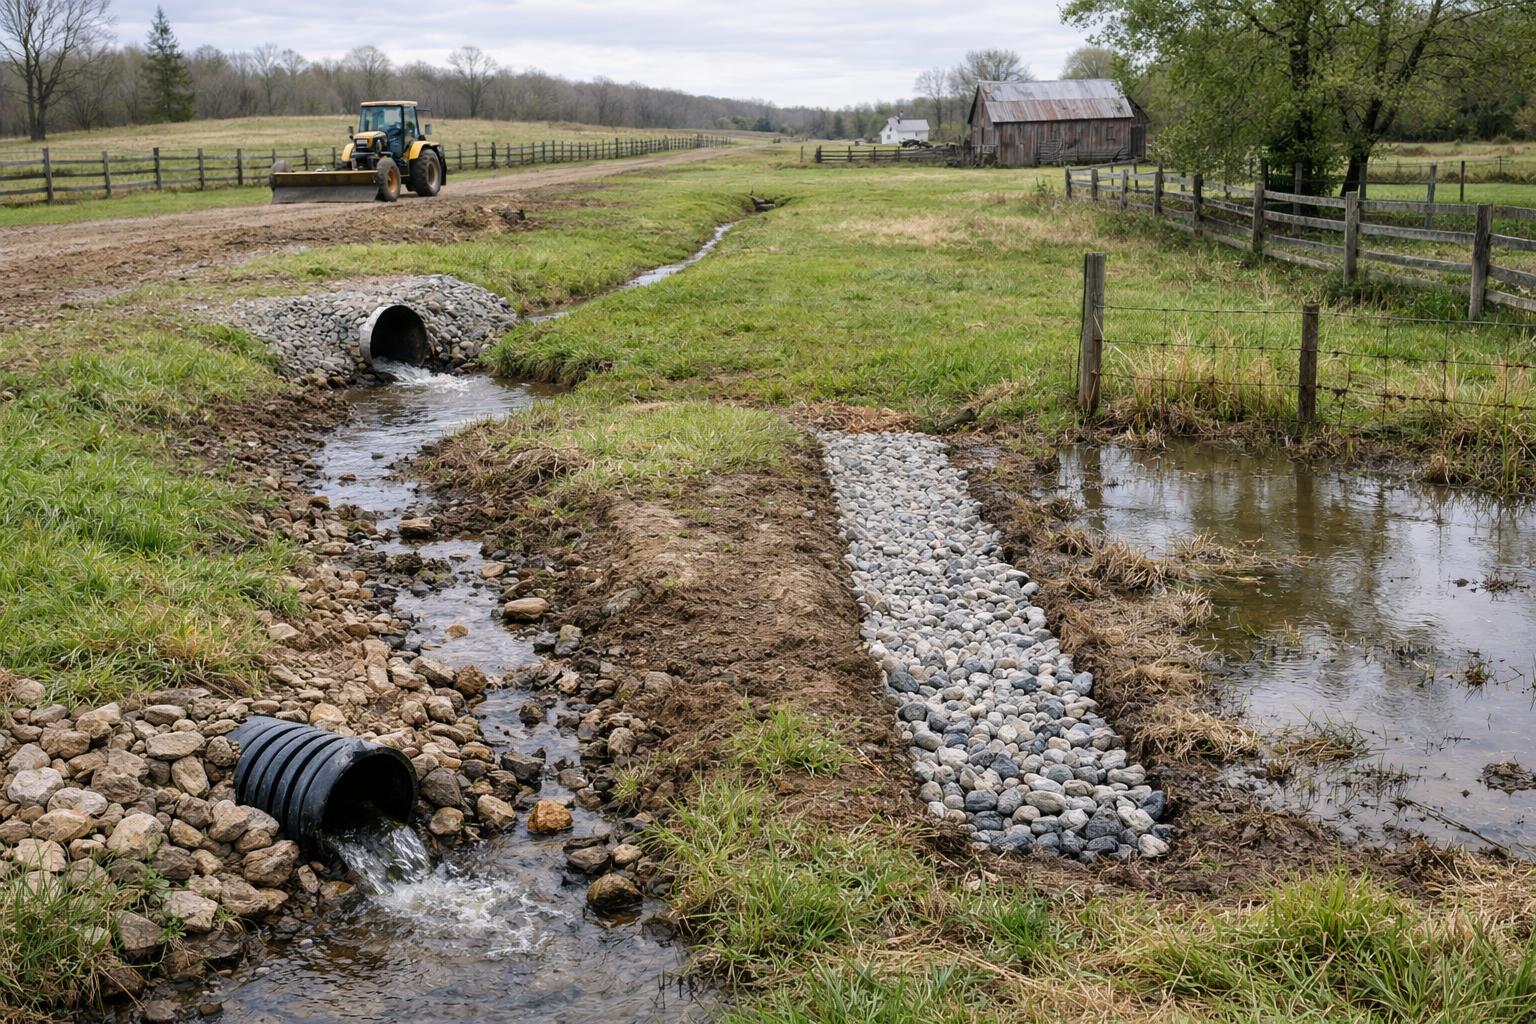
Step 4: Culverts and Road Crossings
If the wet area on your property sits on the downhill side of a road, driveway, or raised berm that blocks natural drainage, the fix is often a culvert — a buried pipe that lets water pass under the obstruction.
Culvert sizing: Undersized culverts back up water during heavy rain events and can overtop roads, causing serious erosion. For small crossings on 1 to 5-acre drainage areas, a 12-inch diameter culvert is the minimum. For crossings on 10 to 30-acre drainage areas or on creek channels with regular flow, use 18-inch or 24-inch diameter. When in doubt, go one size larger — the cost difference between pipe sizes is small compared to the cost of replacing a washed-out road.
Installation: Set the culvert on a firm, compacted base at the natural channel grade. Do not install it flat — a 1% to 2% slope helps the pipe self-clean and prevents sediment from building up in the low point of a flat pipe. Compact fill material in 6-inch lifts above the culvert before driving equipment over it. Most corrugated metal or HDPE culverts need at least 12 inches of cover for light vehicle traffic and 18 to 24 inches for heavy equipment.
Headwalls and outlets: Protect the inlet and outlet of every culvert with riprap or concrete headwalls. Unprotected pipe ends get damaged by equipment and undercut by erosion within a few seasons.
Step 5: Regrading Low Spots
Sometimes the simplest fix for a wet spot is moving dirt. A low area that collects water because it is several inches below the surrounding grade can be corrected by importing clean fill material — subsoil, not topsoil — and regrading to a positive slope that sheds water toward a natural outlet.
Regrading works best when:
- The wet area is relatively small (under half an acre)
- You have a clear outlet direction for the water to flow after regrading
- The surrounding grade is high enough to create positive drainage without creating a new low spot elsewhere
Bring in fill in stages — 6 to 8 inches at a time — compacting between lifts if the area will carry vehicle traffic. After final grade, seed immediately with a pasture mix appropriate for your region and mulch the bare soil to prevent erosion while the grass establishes.
Maintenance: Keeping Drainage Systems Working
Even well-built drainage systems fail without maintenance. Add these checks to your annual property inspection:
- Surface ditches: Walk the full length each spring. Remove sediment deposits that flatten the grade. Mow or spray vegetation in the ditch bottom that slows flow — a clean, grassed ditch bottom is fine, but woody brush will eventually dam flow entirely.
- French drains: Check outlets in spring and after major storm events. If outflow seems reduced, the system may be silting in at the inlet end. Flush with a garden hose or rent a drain snake.
- Culverts: Clear debris from inlets after every significant storm. Inspect for rust or structural damage annually on older metal culverts. A failed culvert is a road failure waiting to happen.
Key Takeaways
- Diagnose your drainage type before spending money: surface ponding, subsurface seeps, compaction, and upslope runoff each need a different solution.
- Surface ditches are the most cost-effective fix for runoff interception — size them at 18 to 24 inches wide, 12 to 18 inches deep, and maintain at least 0.5% slope to the outlet.
- French drains (perforated pipe in gravel trenches) handle subsurface seeps and high water table areas that stay wet even in dry weather.
- Always size culverts one step larger than you think you need — undersized culverts fail roads during heavy rain events.
- Regrading low spots works when the area is small and there's a clear downhill outlet for redirected water.
- Protect every discharge point with riprap to prevent erosion from concentrated flow.
- Inspect and clean drainage systems each spring; a few hours of maintenance prevents expensive failures.
Stop Seeing Deer Only at 2 AM — Get the Free 10-Point Habitat Fix
Your property has specific, fixable gaps — and most 1–50 acre hunters never find them. This free checklist pinpoints exactly what's missing and tells you what to change first so deer start showing up when you can actually hunt them.
- ✓ The food plot timing that pulls deer into daylight hours
- ✓ How to build bedding cover with just a chainsaw (no equipment needed)
- ✓ Stand placement mistakes silently blowing out your property
- ✓ The #1 pressure rule most hunters skip — and deer remember
- ✓ Low-pressure access routes most small acreage owners never plan